 knacksnews
Top 5 Split Screen Video Editors for Windows 10 and Mac Users
Advertisement
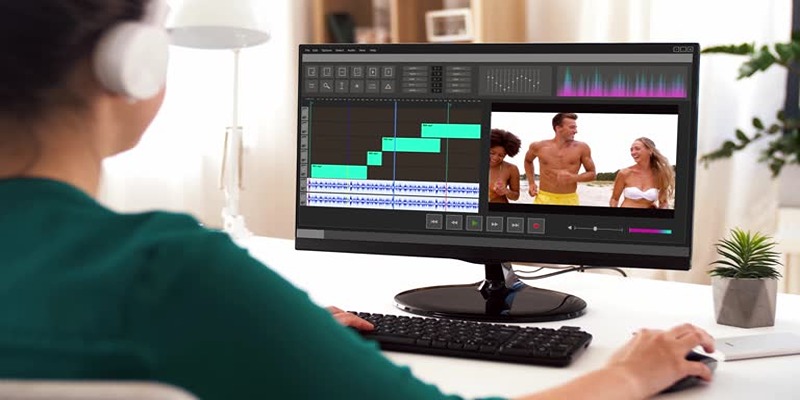
Using split-screen functionalities within video creation lets content creators show multiple perspectives and comparisons as well as multiple narratives simultaneously on a single video frame. Using a suitable video editor turns the video creation process effortless for users who employ Windows 10 or Mac operating systems. The following list contains the top five split-screen video editors which provide simple tools alongside outstanding features for making professional videos.
Adobe Premiere Pro

Adobe Premiere Pro is an industry-standard video editor known for its high-quality features. It’s a professional tool packed with advanced capabilities, including seamless split screen creation.
How to Use Adobe Premiere Pro for Split Screen Editing:
- Import all the clips you want to use for your split screen.
- Drag and drop them onto the timeline in the order you want them to appear.
- Select all the clips on the timeline, right-click, and choose "Nest" to group them together.
- Right-click on the nested clip and select "New Sequence From Clip."
- This will open a new sequence with just the nested clip.
- Open the Effects tab and search for "Crop" or navigate to Video Effects > Transform > Crop.
- Drag and drop the Crop effect onto your clip in the sequence timeline.
- In your program monitor, you will now see handles around your clip that you can adjust to crop the video.
- You can also use the Crop effect controls in the Effects Controls panel to fine-tune your crop.
- Once you are satisfied with the crop, you can export your video by going to File > Export > Media.
2. Final Cut Pro
Final Cut Pro functions as Apple's premiere video editing software because it delivers exceptional speed along with complete compatibility across Apple platforms. Apple users find it simple to work with split screens because the program provides both intuitive features and strong functionality.
How to Use Final Cut Pro for Split Screens
Creating a split screen in Final Cut Pro is a straightforward process that allows you to display multiple video clips simultaneously. Here's a step-by-step guide:
- Import Your Media: Begin by importing all the video clips you want to use. Drag and drop the files into the Final Cut Pro library to organize your project.
- Add Clips to the Timeline: Place the video clips onto the timeline, ensuring that each clip is on a separate layer.
- Resize and Position Clips: Select a clip, then use the Transform tool in the Inspector to resize and position it on the screen. Repeat this process for each clip to arrange them into a split screen layout.
- Apply Cropping (Optional): Use the Crop tool to ensure there are no overlapping edges and to fine-tune the appearance of each segment.
- Add Borders or Effects: If desired, add borders, shadows, or other effects using the Effects browser to enhance the visual appeal.
- Preview and Adjust: Play back your timeline to ensure everything looks the way you want. Make adjustments as needed for alignment and balance.
- Export Your Final Video: Once you're satisfied, export your project using the preferred resolution and format.
3. Filmora
Filmora offers an intuitive interface and plenty of tools for creating split screen videos. It’s a great choice for those who are new to video editing or looking for budget-friendly software.
How to Use Filmora for Split Screen Videos:
- Import Your Media Files: Open Filmora and click on the "Import" button to add videos or images that you want to include in your split screen project.
- Choose a Split Screen Template: Go to the "Split Screen" tab in the top menu and browse through the available templates. Select one that fits your project needs.
- Add Media to the Template: Drag and drop your media files into the split screen placeholders within the template. Adjust the placement and size as needed.
- Customize Your Video: Use Filmora’s built-in effects, such as filters or animations, to enhance your split screen video. Add music from the library to create a polished final product.
- Preview and Export: Use the preview feature to ensure everything looks perfect. When you’re satisfied, click "Export" and choose your desired format and resolution.
With these simple steps, creating a professional-quality split screen video using Filmora is quick and straightforward.
4. DaVinci Resolve
DaVinci Resolve is free to use and packed with features that rival premium software. It’s particularly known for its color grading tools, but its split screen capabilities are also strong.
How to Create a Split Screen in DaVinci Resolve:
- Import Your Clips: Start by importing all the video clips you want to include in your split screen. Drag them into the Media Pool.
- Add Clips to the Timeline: Place each clip on separate video tracks in the timeline to position them properly.
- Resize and Position Clips: Use the Transform tools in the Inspector panel to resize and position each clip within the frame. Adjust scaling and coordinates to avoid overlap.
- Add Borders (Optional): If you want to separate the videos clearly, you can add borders by creating solid color backgrounds or using cropping tools.
- Color Grade: To ensure visual consistency, use the Color tab to apply color grading settings across all clips.
- Export Your Project: Once you’re happy with the split screen layout, export your video in the desired resolution and format.
5. iMovie

iMovie is a straightforward video editing tool included with macOS. While not as advanced as Final Cut Pro, it’s perfect for creating simple split screen videos without a lot of effort.
How to Create a Split Screen Video in iMovie:
- Import Your Media: Open iMovie and start a new project. Click on the "Import Media" button to upload the video clips you want to use.
- Drag Clips to the Timeline: Drag your primary clip to the timeline. Then, drag the second clip above the first one where you want the split screen to begin.
- Enable Split Screen: Select the second clip in the timeline, click on the "Video Overlay Settings" button above the preview window, and choose "Split Screen" from the dropdown menu.
- Adjust the Split Screen: You can adjust the position of the split by selecting either "Left/Right" or "Top/Bottom." Use the sliders to further modify the layout if needed.
- Preview and Refine: Play your video in the preview window to ensure the split screen looks smooth and properly aligned. Make any necessary adjustments.
- Export the Project: Once satisfied, click the export icon, choose your desired resolution, and save your finished split screen video.
Using iMovie's straightforward interface, creating a split screen effect is quick and easy, making it a great tool for simple video projects.
Conclusion
When it comes to creating split screen videos, selecting the right video editor is essential for achieving professional and polished results. The top five split screen video editors for Windows 10 and Mac users each offer unique capabilities, from advanced editing tools to user-friendly interfaces. Whether you prioritize customization options, speed, or cross-platform compatibility, these editors deliver quality and versatility.
On this page
Adobe Premiere Pro How to Use Adobe Premiere Pro for Split Screen Editing: 2. Final Cut Pro How to Use Final Cut Pro for Split Screens 3. Filmora How to Use Filmora for Split Screen Videos: 4. DaVinci Resolve How to Create a Split Screen in DaVinci Resolve: 5. iMovie How to Create a Split Screen Video in iMovie: ConclusionAdvertisement
Related Articles

Best AI Image Editors to Transform Your Photos in Minutes

Top AI-Powered Note-Taking Apps You Need to Try

Building Trust: Ethical Principles in Online Tool Development
Best Free Video Editing Software for Beginners in 2025

A Comprehensive Guide to the Best ERP Software in 2025

Google Sheets vs. Excel: A Simple 2025 Comparison

Top Free AI Tools to Transform Your Workflow in 2025

Top Sony Vegas Plugins to Enhance Your Video Editing Experience

5 AI Writing Generators That Will Transform the Way You Write

Airtable Vs. Trello in 2025: A Complete Guide to Pros, Cons, and Best Uses

6 Best Photo Editing Apps of 2025 for iOS and Android Users